
Ranked 1v1 - A Comprehensive Strategy Guide
Want to learn how to get better at Colonist ranked 1v1 games? Read on!

Colonist.io is the best way to play Settlers of Catan for free online, and the ranked 1v1 game mode is a thrilling, fast-paced alternative to the 4 player base game.
I am David George, also known as Davbav. I was the #1 Ranked 1v1 Player Worldwide (for a total of 4 hours) last season, and finished the season ranked 30th and 33rd, on 2 accounts. I also won 19/24 of my games on the final day of the season.
RULES
The 1v1 game mode on Colonist.io has a number of differences to the 4 Player Base Game. Most notably, there are only 2 players, Friendly Robber is On, Dice are Balanced, game-speed is set to Very Fast, win condition is set at 15 Victory Points, and you can safely hold up to 9 cards in your hand without 7ing out.
1v1 FUNDAMENTALS
- You have a maximum of 13 points to build with all 5 Settlements and 4 Cities. This means you can’t win without Army, Road, or multiple Victory Points. You also can’t win without a City.
- Play as much as you can! 1v1 allows for experimentation at a higher frequency than 4P due to how quick the games are. There are skills and tactics necessary in 1v1 that you will rarely or never encounter in a 4 player game.
- Be wary of your opponent. Just as you should aim to make the game more difficult for your opponent, they will surely look for opportunities to slow down your progress. Do what you can to prevent that, while capitalizing wherever possible against your opponent.
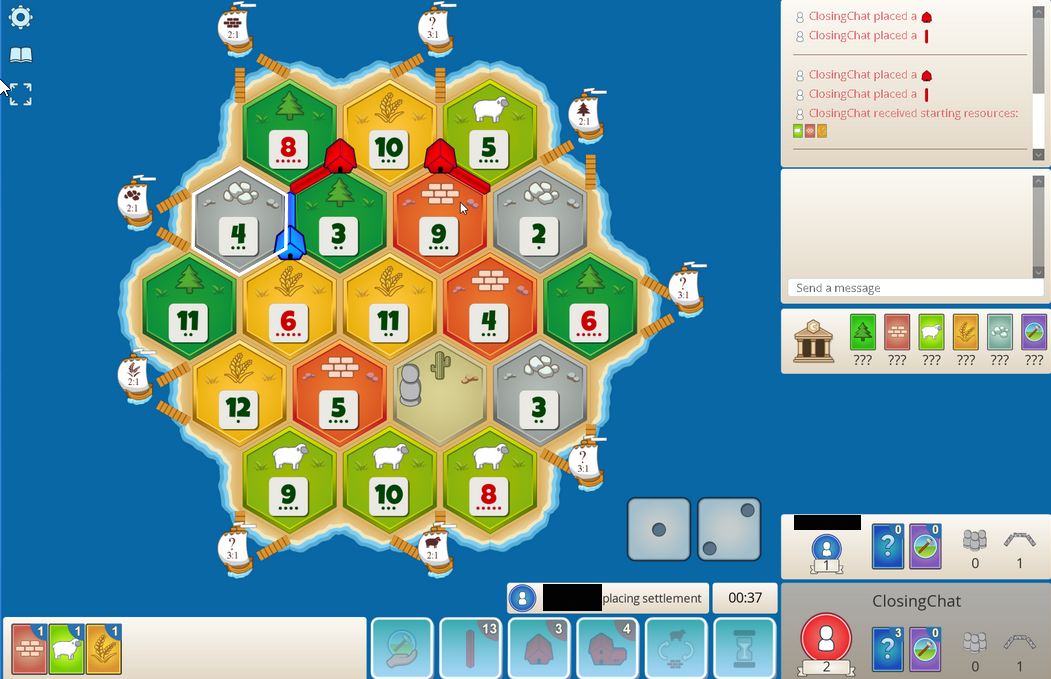
PLACEMENTS
Placements (including starting roads) have a HUGE impact on the game. 1v1 games are primarily decided by placements to the extent that a misplay or oversight in the placement phase often results in a resignation.
- Consider resource scarcity, Ports, City quality, and production in that order.
- If there isn’t a clear dominant Ore, Wheat ,or Brick position, look for the Ports that will allow a player to gain a long-term advantage as production increases.
Due to the lack of trading, you are 100% self-sufficient, and must figure out how to remain self-sufficient after you get your first point on the board.
The average 1v1 game runs for 69 turns. Balanced Dice means that dice rolls are more predictable, so luck is less important. This also means that coordinated Wood-Brick rolls, Wheat-Ore rolls, Sheep-Wheat, or Sheep-Ore are not only easier to secure on a board with more space, but they are also certain to roll, and more likely to roll as often as expected.
Playing with all 5 resources is ideal and allows for a flexible early game based on the rolls.
Playing 4 resources should be generally contingent upon settling onto the 5th resource as well as securing a strong Port. The most effective 4 resource setup is generally the Wood-Brick-Wheat-Ore combination, allowing for securing expansions, and increasing production via Cities, which in turn allows for easier porting for the missing resource to settle. Strong road production can unlock access to hexes that can make your setup self-sufficient.
Alternatively, a hybrid OWS setup can be effective, having a touch of Wood or Brick allows for steals to build roads, and easier activation of the Road Builder, Monopoly, and Year Of Plenty Development Cards.
Finally, full OWS can be played in certain situations.
You can win games in 1v1 without any Wood or Brick production. This requires using knights effectively on your opponent’s Wheat and/or Ore to prevent Development Cards, expansions, and Cities, securing multiple VPs and Army, as well as at least a Road Builder or Year of Plenty to secure a Settlement spot. If you can expand onto a spot with Wood+Brick, more OWS, or a strong Port, your game becomes much more flexible with the added strength of better dev card production and therefore robber control than your opponent.
Your setup should aim to buy dev cards consistently and build Cities.
Take great care with your starting roads. Consider the potential to either secure or lose a spot to your opponent (how risky is that play based on the rolls that are required to give you the expansion?), as well as the relevance of defending a key hex.
If you are placing 1st, always ask yourself :
What is the worst case scenario if 2nd decides to play defensively against your dominant 1st pick?
Finally, if you are placing 2nd, choose your starting resources carefully. It could be the difference between an early City or a stuck hand, a 3rd Settlement or a hand full of Brick.
EARLY GAME
Momentum is key. If you can steal momentum from your opponent consistently, reblocking key hexes, taking away their settle spots (especially if they have committed roads), and maintaining pacing on devs, your opponent will struggle to keep up, allowing you to snowball to victory!
1v1 may lack social interaction and trading, but psychological elements are still at play and remain relevant. 33% of 1v1 games end prematurely due to a player resigning. There are a number of ways to induce your opponent to resign. Of course, in many of those situations, you would likely win anyway, if the game ran the full length, but there remain many variables that could come into play through the course of a longer game.
In short, there can often be a disparity between the optimal play, and the play that is most likely to make your opponent quit. This is a viable strategy and highly effective in certain situations.
What is Friendly Robber?
Friendly Robber is a balancing mechanism in 1v1 that means you can only be blocked and stolen from after you openly have more than 2 Points. This can come in the form of a Settlement, City, Longest Road, or Largest Army but doesn’t count Victory Point cards.
Friendly Robber can be leveraged in a number of ways, especially when considering that hand size has been raised to 9 cards. You can stock up on Dev Cards early, spend multiple roads to secure expansions and/or take them away from your opponent, and plan big opening turns.
9 cards makes for the perfect Settlement + City turn, and you could safely have as many as 13 cards on that turn. Getting onto a Port and dropping a City can make you unblockable in the pursuit of expanding, citying, and buying Dev Cards. Dropping a City and buying a Dev Card is always a great turn, but less effective if your opponent hasn’t got a point down yet, as they could still rob you without you being able to return the favour.
The early game is extremely important and must be handled with caution.
Make sure not to spend cards if not pressured by the risk of 7 out, or your opponent’s ability to build roads to block your expansions. Throughout a game of 1v1, you will be able to perfectly track your opponent’s hand, though this is easiest and most important right at the beginning.
MIDGAME
Once your opponent has achieved a 3rd Victory Point you will be able to block and rob them!
Being able to block another player’s only Wheat hex is extremely powerful, and can prevent them from settling, citying, or buying development cards! The counterplay is to either have multiple Wheat hexes from starting placements, settle onto a 2nd Wheat hex, or settle onto a Port that allows you to substitute for Wheat with other resources.
If a player has successfully secured their Wheat production through any of the mentioned means, the effective blocks should turn to Ore.
If a player has unblockable Ore and Wheat, you are probably in trouble, but if viable, target the Sheep which in turn prevents actioning without use of a Port.
Of course, one must take into consideration the value of production with a Port. If an opponent produces 4 Brick on the 6 roll with a Brick Port, that is more valuable than a single Ore on the 8 roll.
Your blocks should aim to plug your opponent’s flexibility.
The further you advance into the game, the less reliant one should be on an individual hex. However if there is only one good Wheat hex on the board, for example, sharing it with your opponent can be beneficial, as it will never be blocked.
Pay attention to expansions on the board. Which short and long term expansions could allow your opponent to become dominant on the board?
During the midgame, you should assess the availability and value of each win condition. If you’ve pulled 3 VPs and your opponent has a major lead on Army, maybe drive for Cities, expansions, and Longest Road instead of buying more dev cards.
If your opponent has the clear road play, go hard on Dev Cards, and production, with potential to sneak Road for win if you don’t alert your opponent to it at all.
If your opponent has massive production but a poor position for Road and no Army pacing, do what you can to secure Road and Army/VPs. A player who has committed fully to expanding may suffer for lack of available points in the endgame.
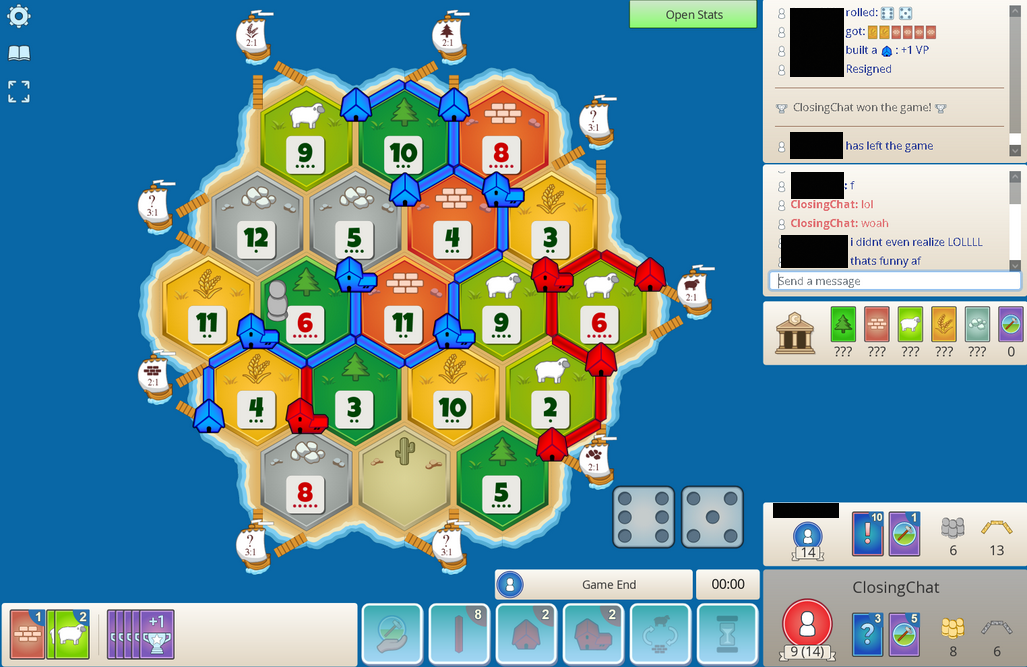
ENDGAME
Closing out the game can get very technical, but your goal here is to find, prevent, and secure win conditions.
Counting Roads and tracking Dev Cards is also crucial. If your opponent is holding 5 non knights, and no Monopolies have been played, you have either VPs or Monos to pull for. Alternatively, your opponent may build a road sub-optimally for their network, opening a chance for you to build a longer Longest Road.
Your optimal block may change based on your opponent’s win condition. If they have 4 Cities and need Longest Road to win, the Ore block may become less effective than a Wood or Brick block for example.
Finally, losing doesn’t necessarily mean that your placements were wrong, and winning doesn’t mean that your placements were optimal. Whether you win or lose, take a look at the dice stats, number of steals relative to number of knights played, and blocked production.
Test out these Catan tips and tricks on Colonist.io
Written by David George